I use a number of different backup products in my SBSfaq.com office environment, one of those is ShadowProtect. My Terminal Server is Windows Server 2008 R2 and it’s been running on top of a Windows 8 Hyper-V server as I test it out. I’ve had ShadowProtect running inside the Guest Virtual Machine so as to ensure I got a solid backup of my data should something go wrong. Well this week something went wrong. I had a hardware failure of the server and just my luck, it’s not covered under warranty and I’m not sure if I will get it repaired or not. My solution is quite simple. Take the backups and convert them to a VHD and get them running on hardware platform. Not many people know that you can convert a ShadowProtect backup directly into a VHD. This is how you do it.
Note – you can also use this process to convert a ShadowProtect backup to a VMDK or a SPF (ShadowProtect Full Backup) file as well.
1. Install ShadowProtect onto a machine – it does not have to be licensed as you are only using the conversion tool. Reboot as needed.
2. Open ShadowProtect
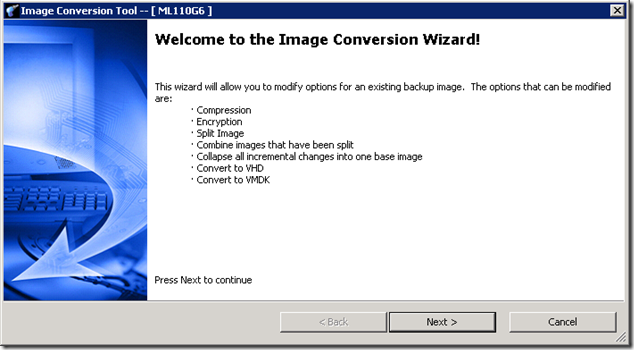
3. Select Image Conversion Tool from the Tools menu on the left hand pane
4. Select Next to continue
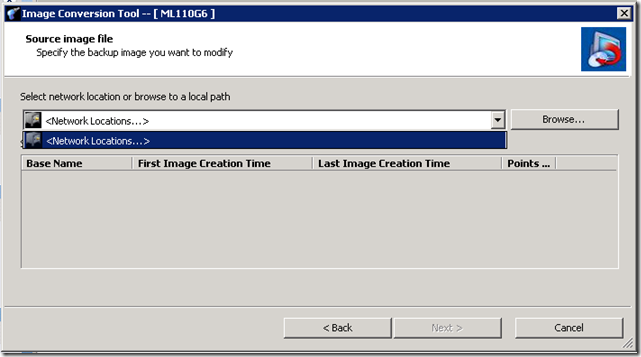
5. Select Network Locations
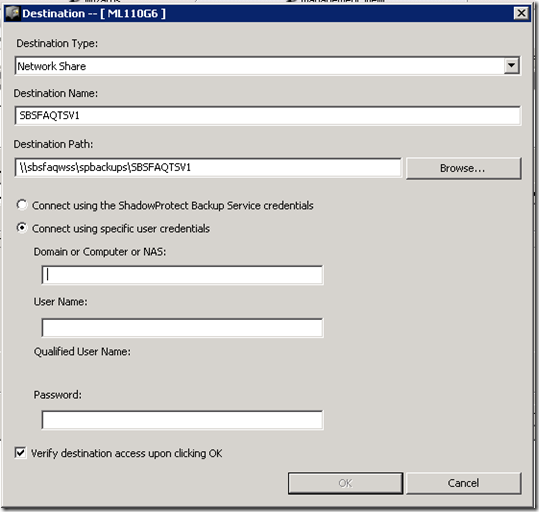
6. Fill out the form listing the network location where the images are stored
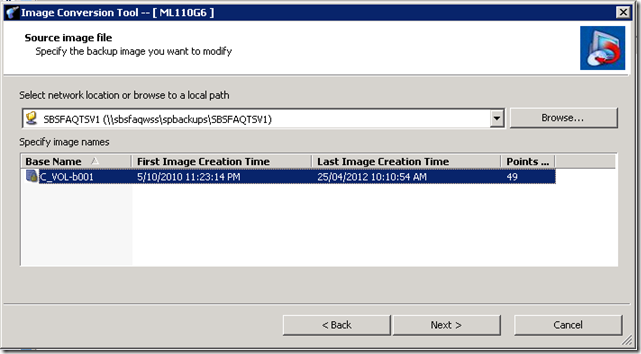
7. It will now list the volumes that it has found here
8. Select the volume you wish to convert and then select Next to continue. If you have password protected the images, you will now be prompted for the password. Enter it and select Ok to continue
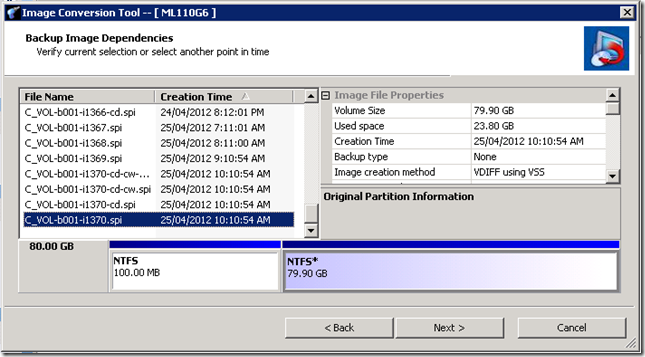
9. You will see the a list of all the backup points that you can restore this system from. Select the one you want and then select Next to continue
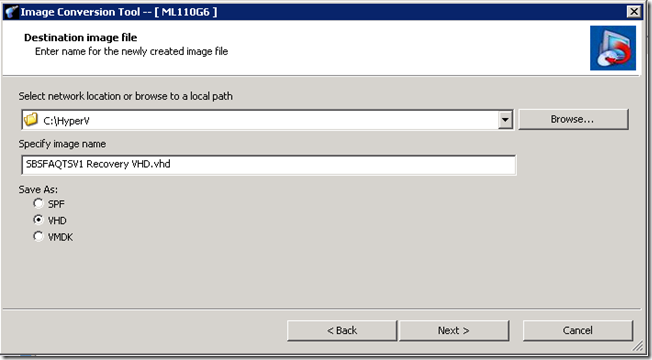
10. Specify the destination location where you want the VHD file created. Also specify that you want it to create a VHD and select Next to continue
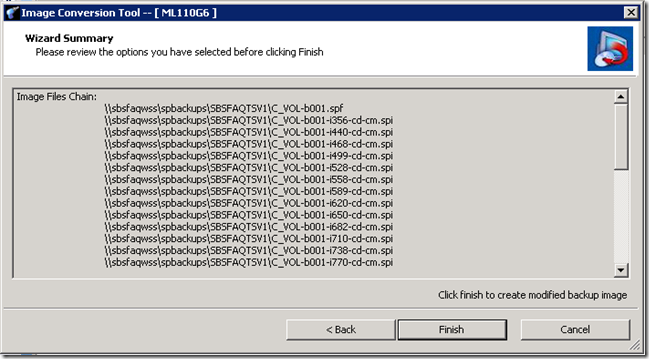
11. It will display a summary screen for you to review. Select Finish for it to start the image creation process.
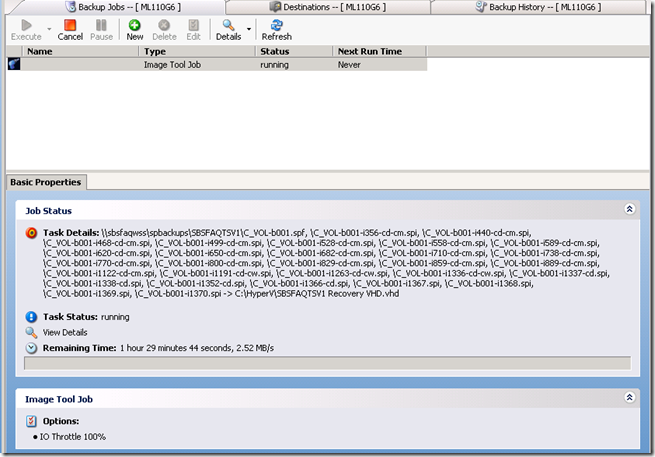
12. ShadowProtect will now run the job and you can see the status below.
13. The time it takes to complete the job is a direct relationship to the number of files in the image chain. The more files in the chain, the longer it will take.
14. Once the conversion is complete, you will need to do a couple of things. Boot into the ShadowProtect Recovery Environment.
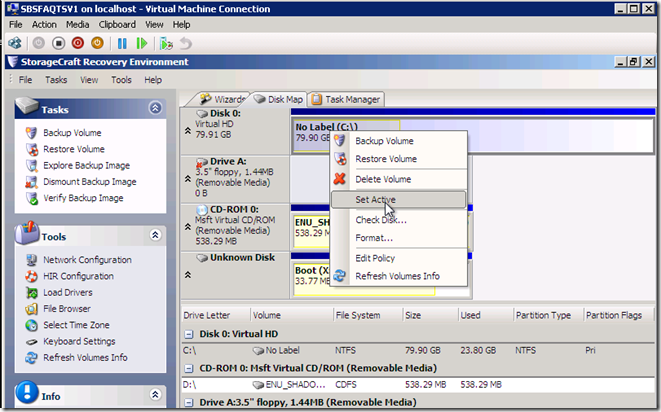
15. Set the partition to be Active as below
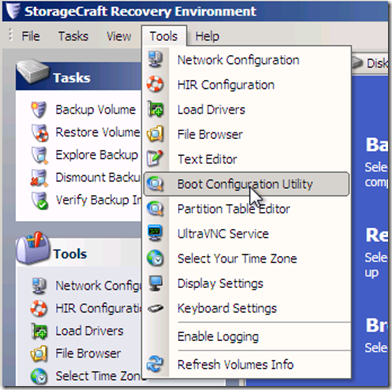
16. Select the Boot Configuration Utility from the Tools menu
17. You will see that the BCD Store is broken on this VHD – you can select Auto Repair to fix it
18. This is it fixed!
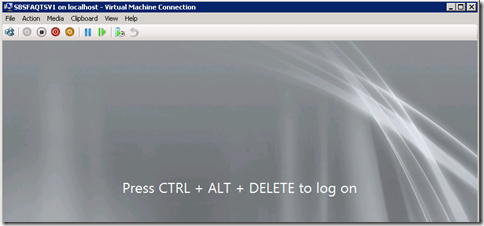
19. Now boot the Virtual Machine and you should be good… for the most part anyway ![]()
A couple of things to be aware of here too…
1. The image you’ve just created does not have the same disk signature as the disk – therefore if you try to run any backups using ShadowProtect from within this newly created machine, they WILL FAIL. The error message will be something like the screenshot below. The only way to resolve this is to edit the backup job and reselect the volumes you wish to backup and start again with a new full backup image.
2. Given you need to create a new base image, you will also need to prune/delete the older images in the destination folder. This might well affect your archival requirements. Therefore assess if this method is the best way for you before you start!



Great write up Wayne!
Thanks Greg – feel free to share it around!
With DAEMON Tools Lite Commercial you possibly can create ISO
and MDS image recordsdata from authentic discs inserted in bodily CD/DVD/HD DVD/Blu-ray drives.
Here is my situation. I have a Physical SBS 2011 Server with an MBR, an ACTIVE D System Reserved Partition and the SBS 2011 OS C partition. I create a head start restore of the C and D partition. Finalise the head start restore. Go to Hyper V and create a Virtual Machine. If I place the C and D VHD files in the virtual machine, I get an error message asking me to put the original OS disk in and fix the MBR etc . If I only use the C drive VHD, I get the flashing VM, will not boot.
Question 1
Just so I understand this, is the suggestion that the DR machine, that stores the VHDs, needs to be shutdown, start Recovery environment, fix the C drive VHD, reboot the machine, Restart Hyper V, reload the VHD and it will work. That is just crazy in my opinion?? If a virtual boot is run from Shadow Protect, it is not an issue, it will virtual boot albeit very slowly, using SSDs, but will take a few hours to rebuild the physical into a VM completely.
Question 2
What does Shadow Protect Virtual Boot do that Headstart Restore does not with reference to booting?
Any help would be appreciated?
Kind Regards,
Stewart
Hey Stewart,
After you do the restore and commit the HSR, boot from a ShadowProtect Recovery DVD and use the Boot Manager utilities to fix the boot records to point to C: , and you should be good to go.
Virtual Boot handles the above automatically